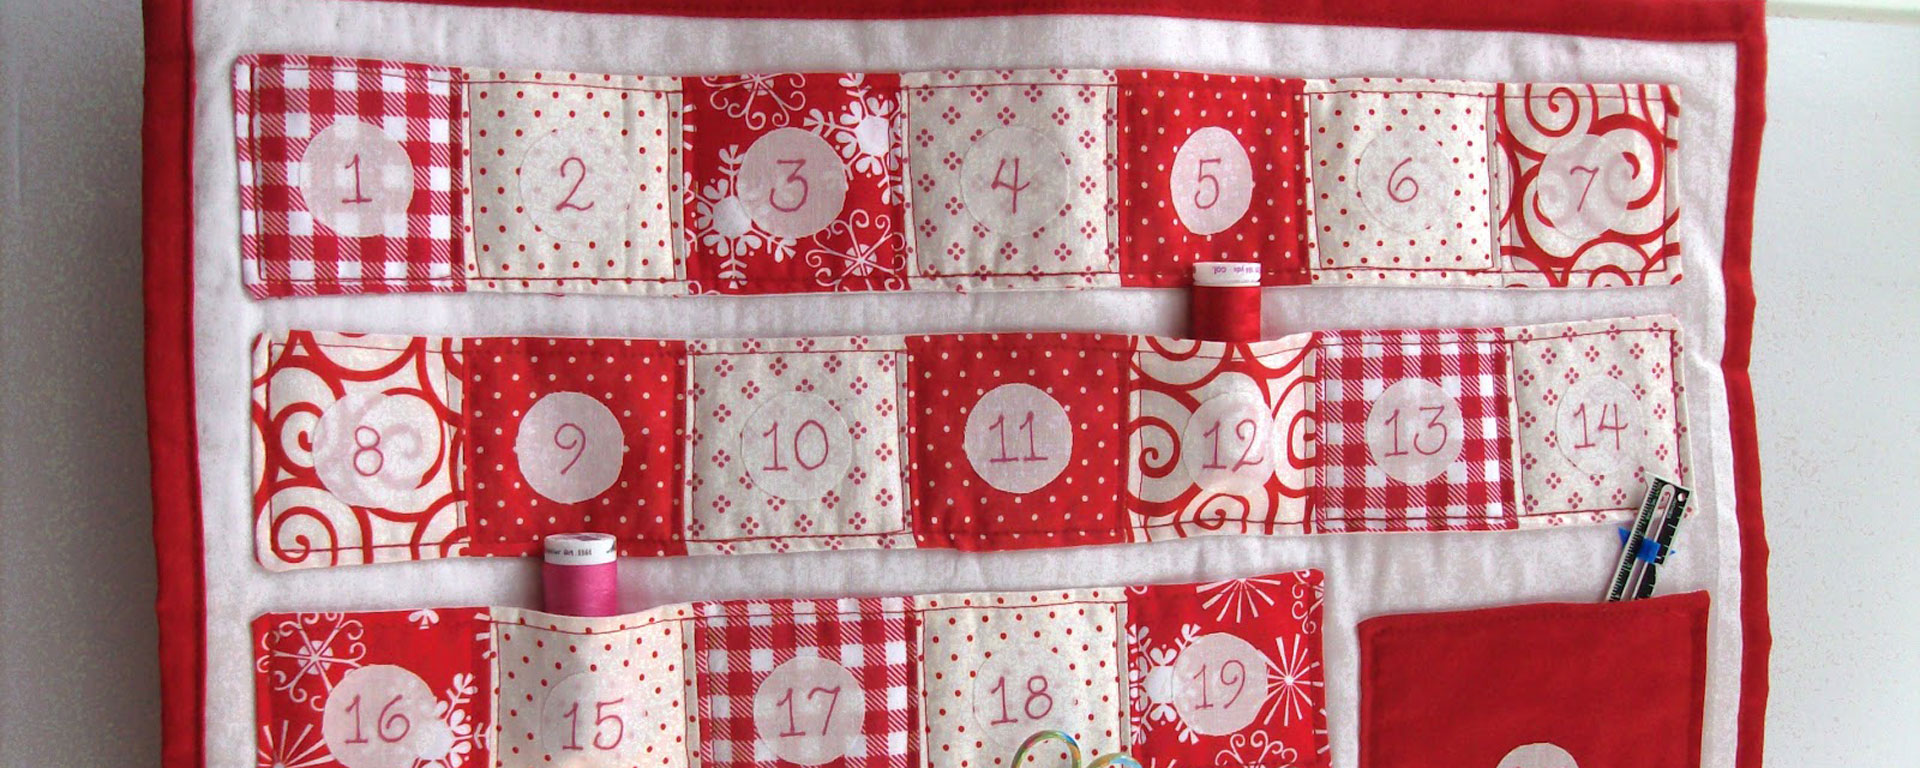
Happy (almost) Thanksgiving!! If you’re like me, you’re probably being bombarded right about now with wonderful holiday craft ideas from magazines, books, blogs, and (of course) Pinterest. This year, I’ve particularly admired the beautiful advent calendars with cute pockets decorated with applique and embroidery. But advent (and the new year) would be long gone before I could get one of those intricate projects close to completion. So here is my solution, a quilted advent calendar–all fun and no fuss.
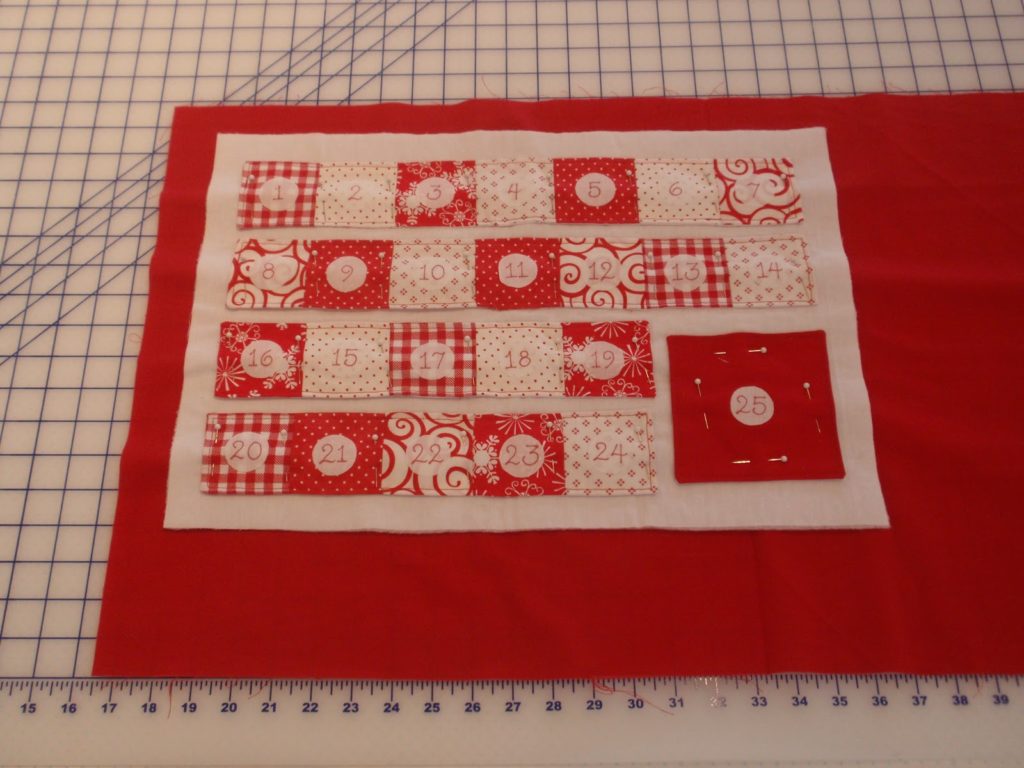
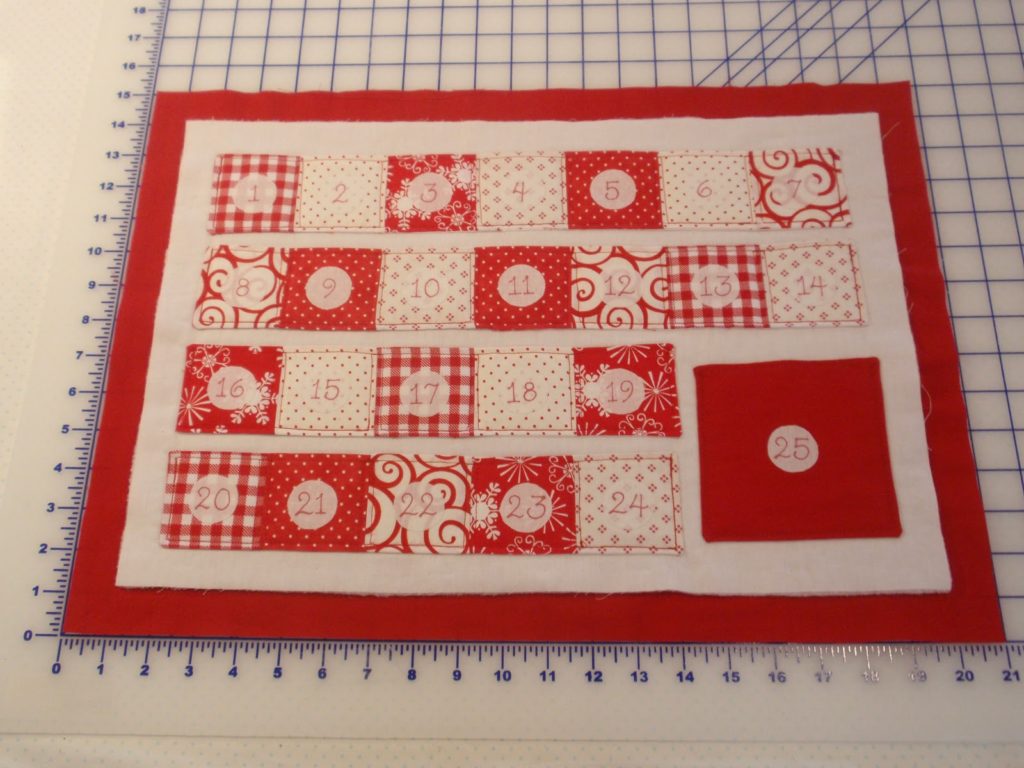
Instead of making 25 individual pockets, I sewed squares into longer strips, ending up with four long pockets and one big pocket for Christmas day. The long pockets are divided into smaller pockets when everything is quilted together at the end.. I also traded the hand embroidery and applique for fabric marker and Steam-a-Seam. Then I finished it off with Jera’s quick quilt binding technique. All together, it makes for a project that you can finish by December 1st.
Quilted Advent Calendar
Finished size: 14″ x 20″
Pocket size: approx. 2″ square, large pocket approx. 4 1/2″ square
For this project you will need:
- Permanent Fabric Marker
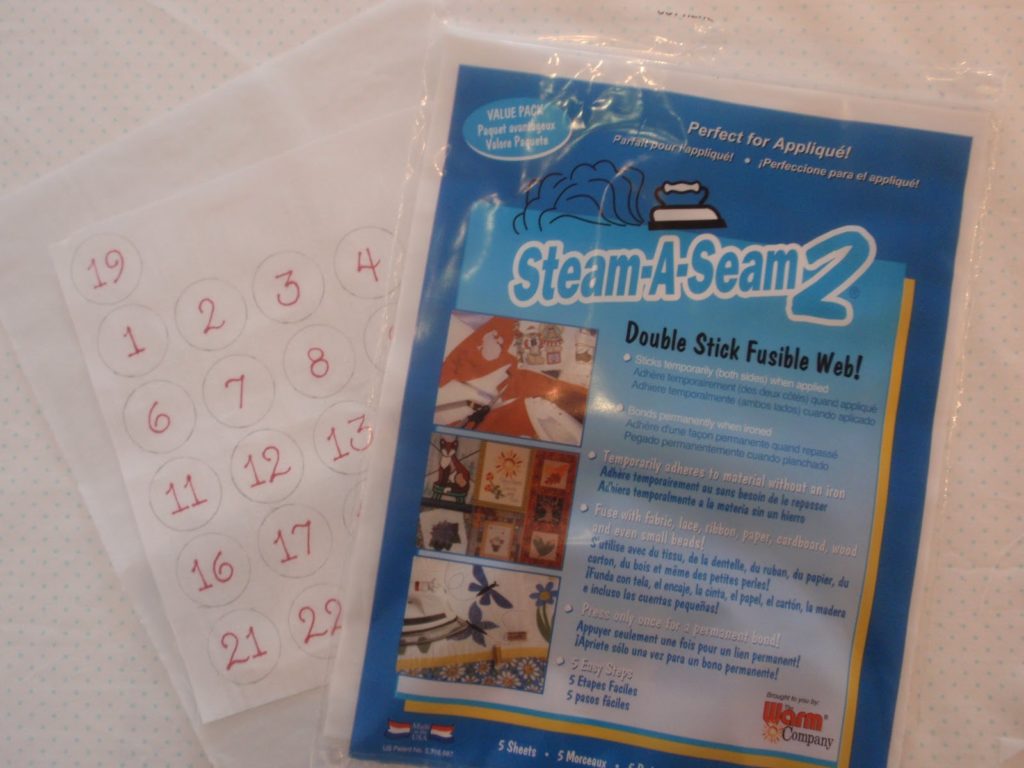
- Steam-a-Steam (or other double sided fusible interfacing)
- 6-inches coordinating ribbon (~1″ wide)
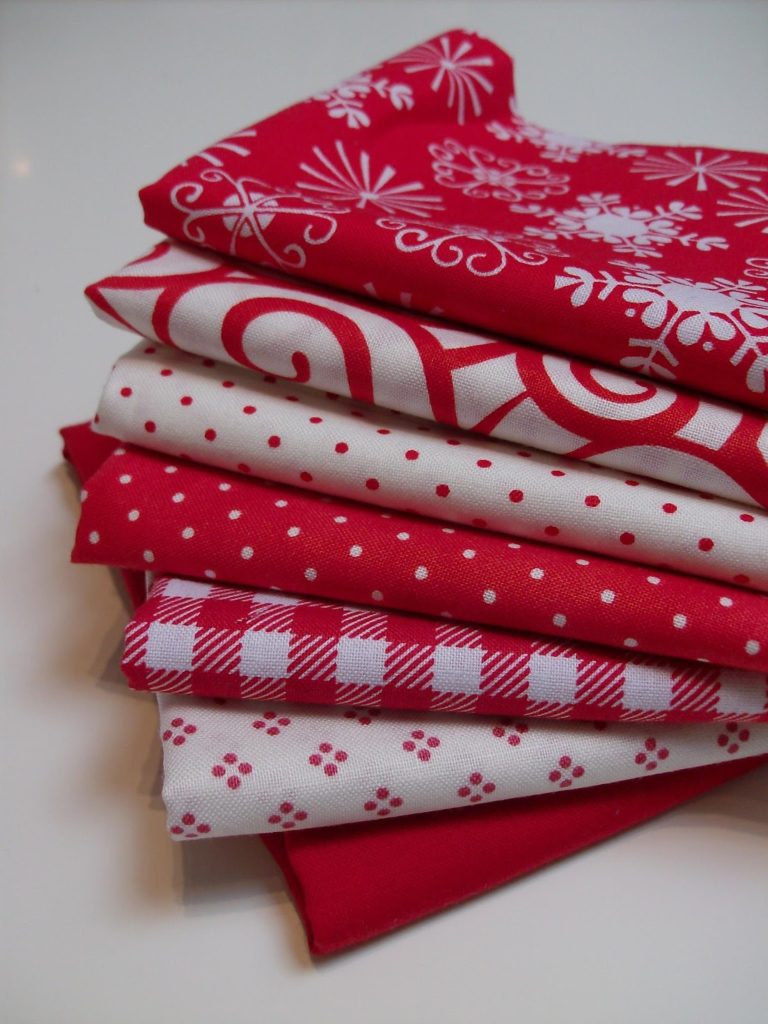
Assorted Fabrics:
- (24) 3″ squares, for the small pockets
- (1) 5″ square, for the large pocket
White Fabric:
- (2) 3″ x 18″ strips, for lining the 2 longest pockets
- (2) 3″ x 13″ strips, for lining the 2 shorter pockets
- (1) 5″ square, for ling the square pocket
- (1) approx. 10″ square, for making number circles
- (1) 13″ x 19″ rectangle, for the front
Backing Fabric (will also be folded over to create binding on the front):
- (1) approx. 15″ x 21″ rectangle (a fat quarter could work)
Fusible Fleece:
- (1) 13″ x 19″ rectangle (or a larger piece of quilt batting)
Part 1: Making the Pockets
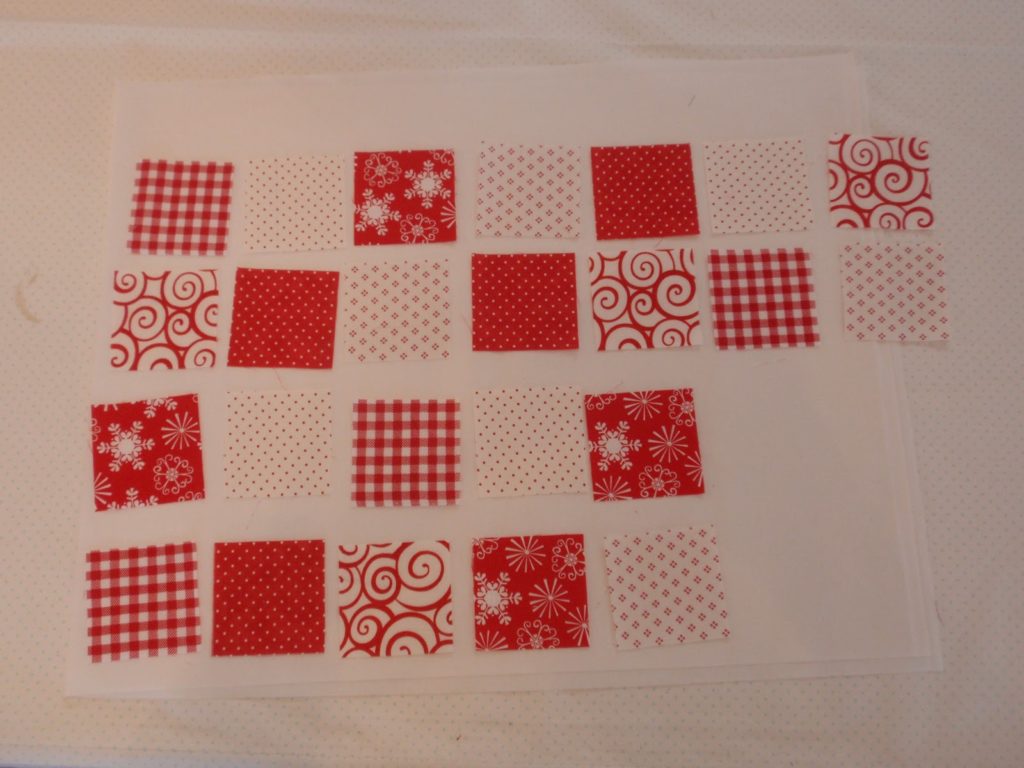
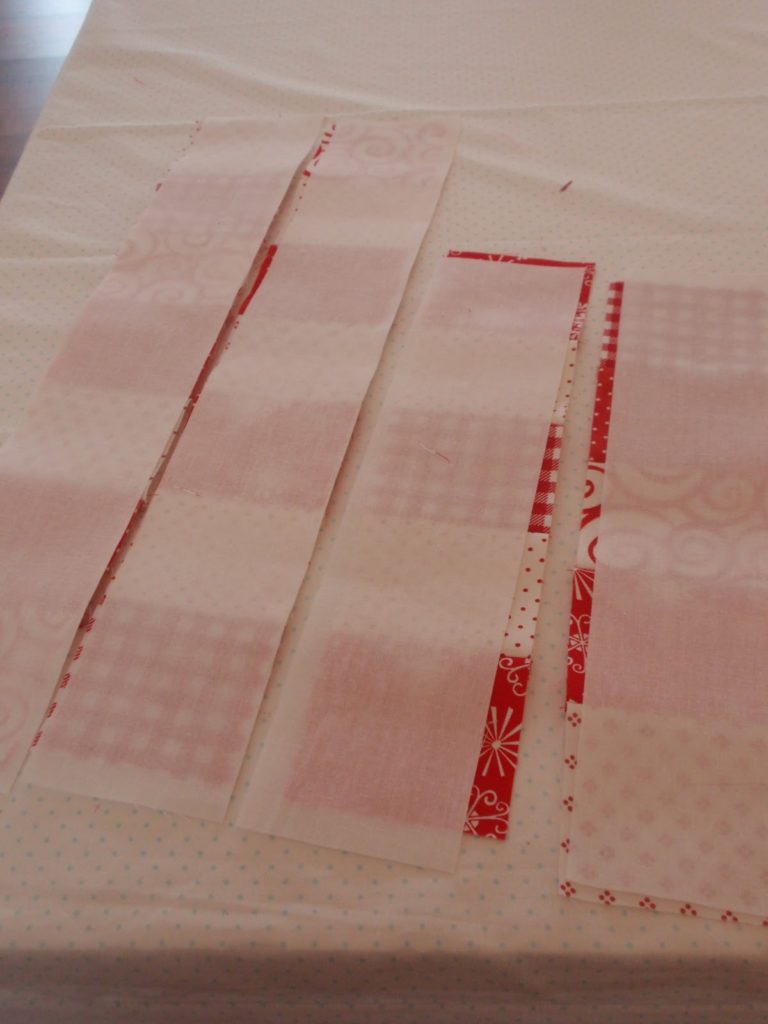
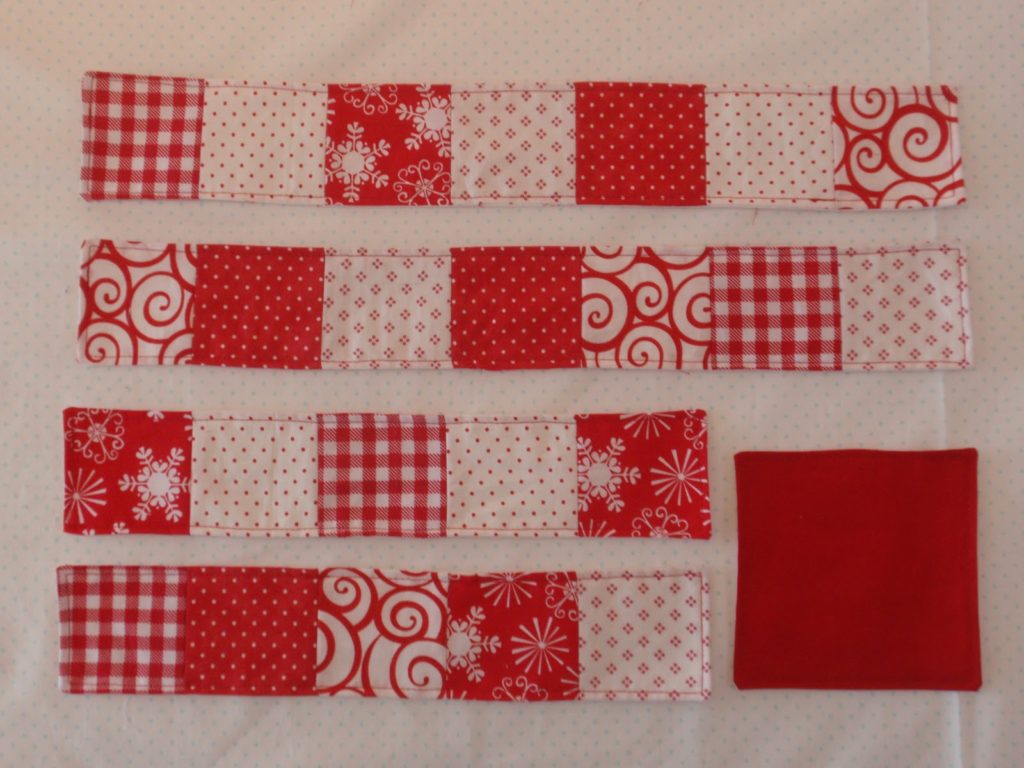
Arrange your squares into two rows of 7 and two rows of 5.
Sew the rows together using a 1/4″ seam allowance.
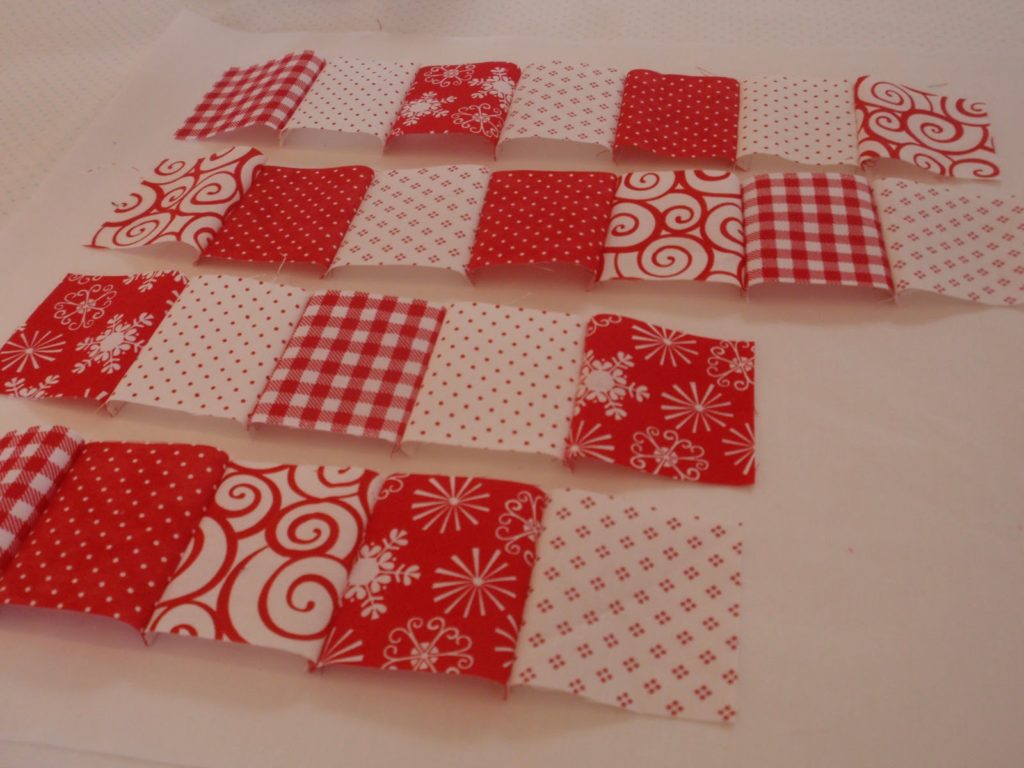
Press the seams open.
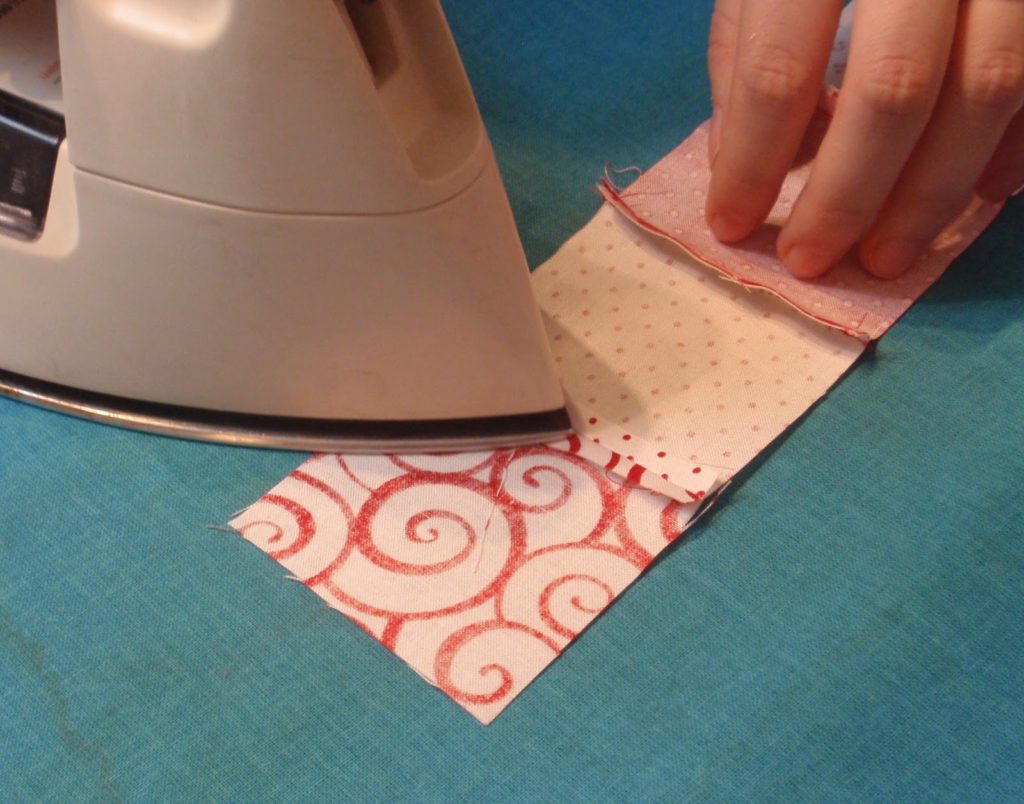
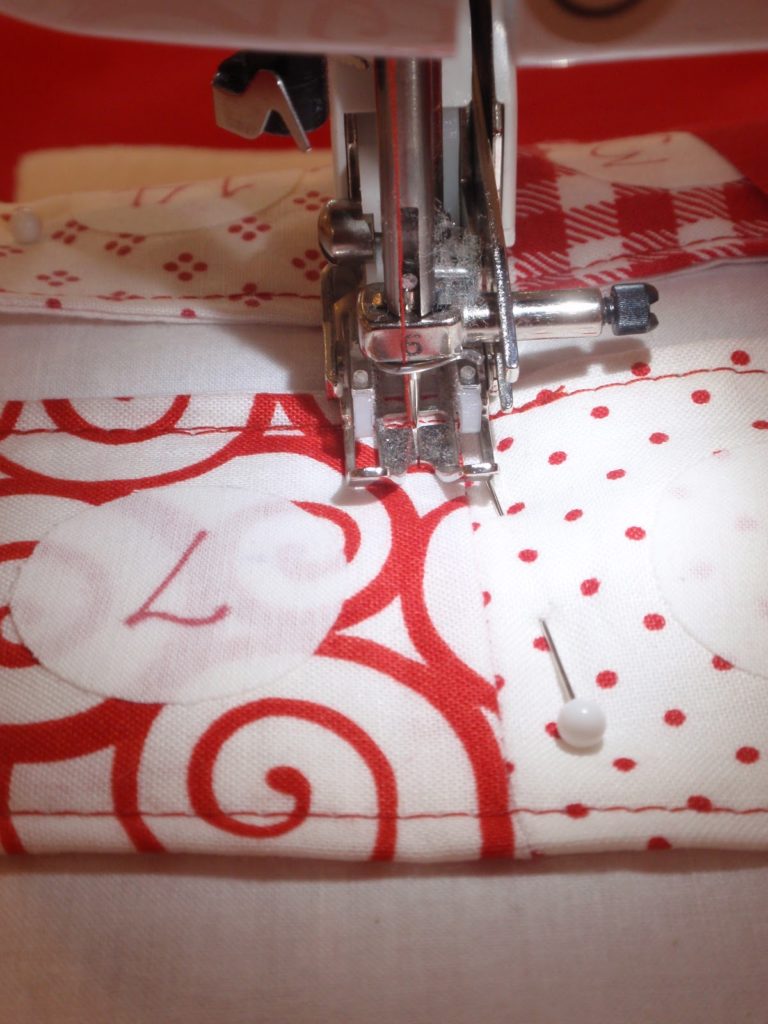
Lay the strips of white on top of your rows with the right side of the colored fabric against the white.
Stitch around each row 1/4″ from the edge. Leave a gap so that you can turn it inside out.
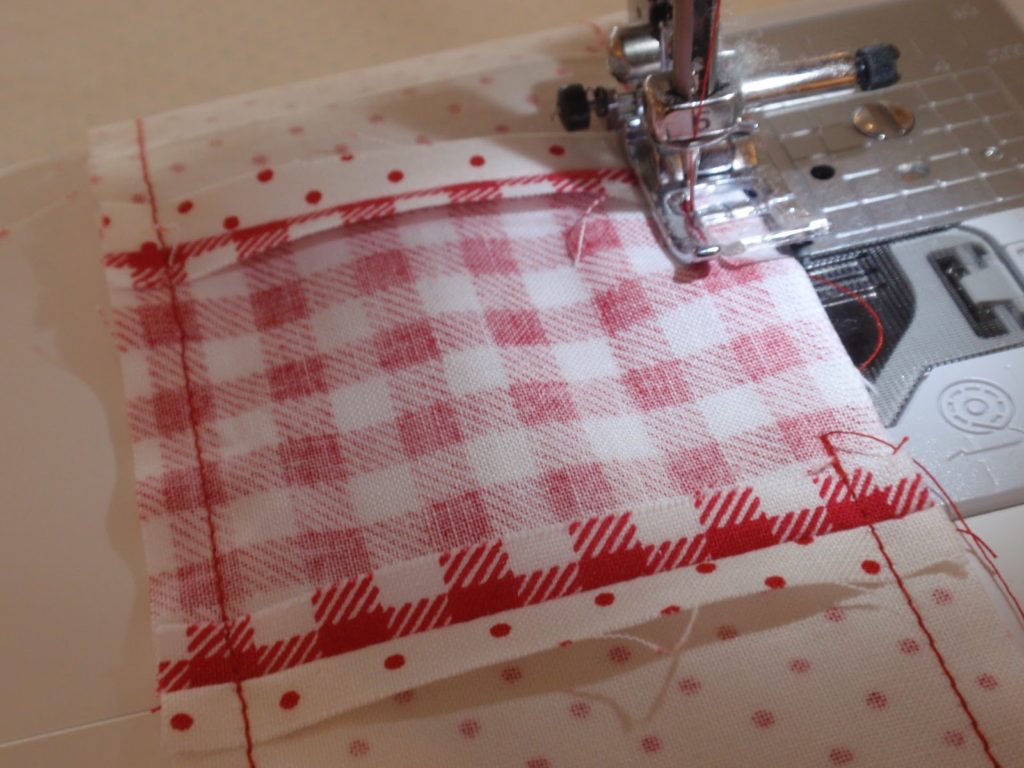
Clip the corners (not too close to your stitching) and turn the pocket inside out. Get the corners as pointed as you can, but don’t fuss over them too much.
Press again.
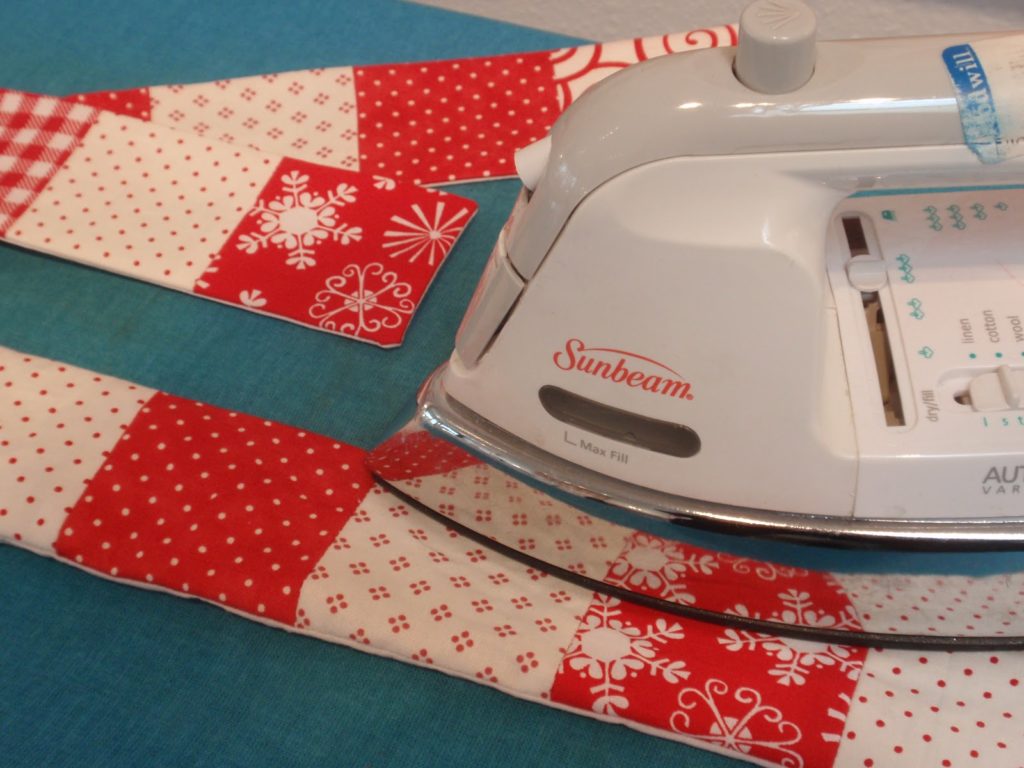
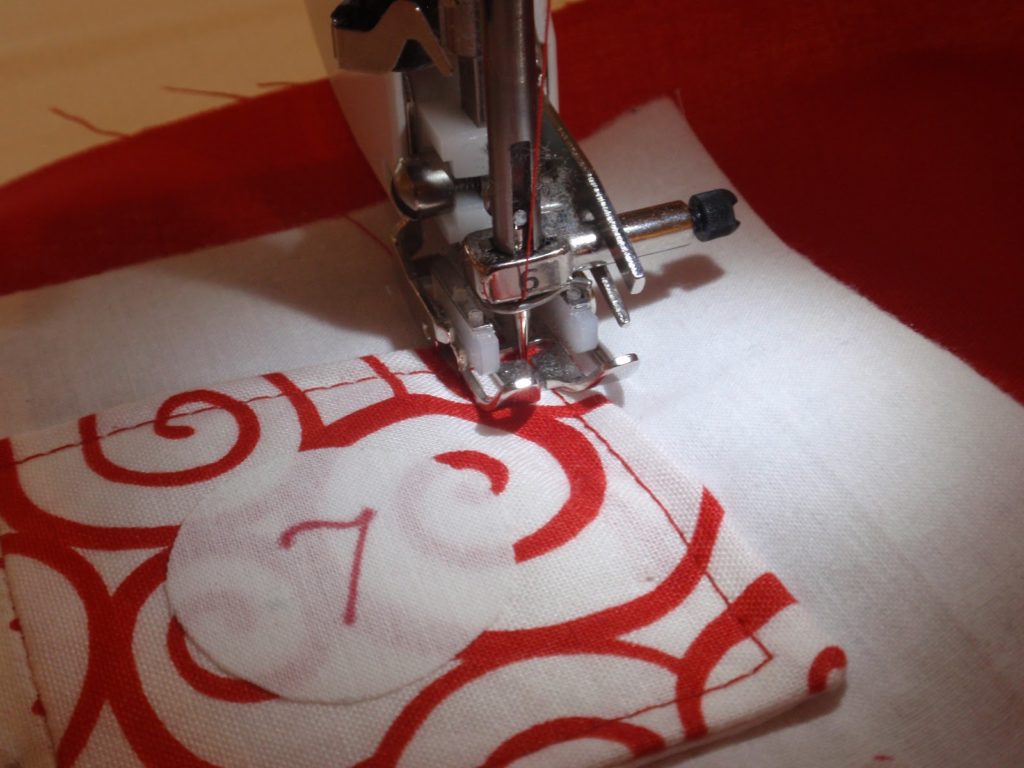
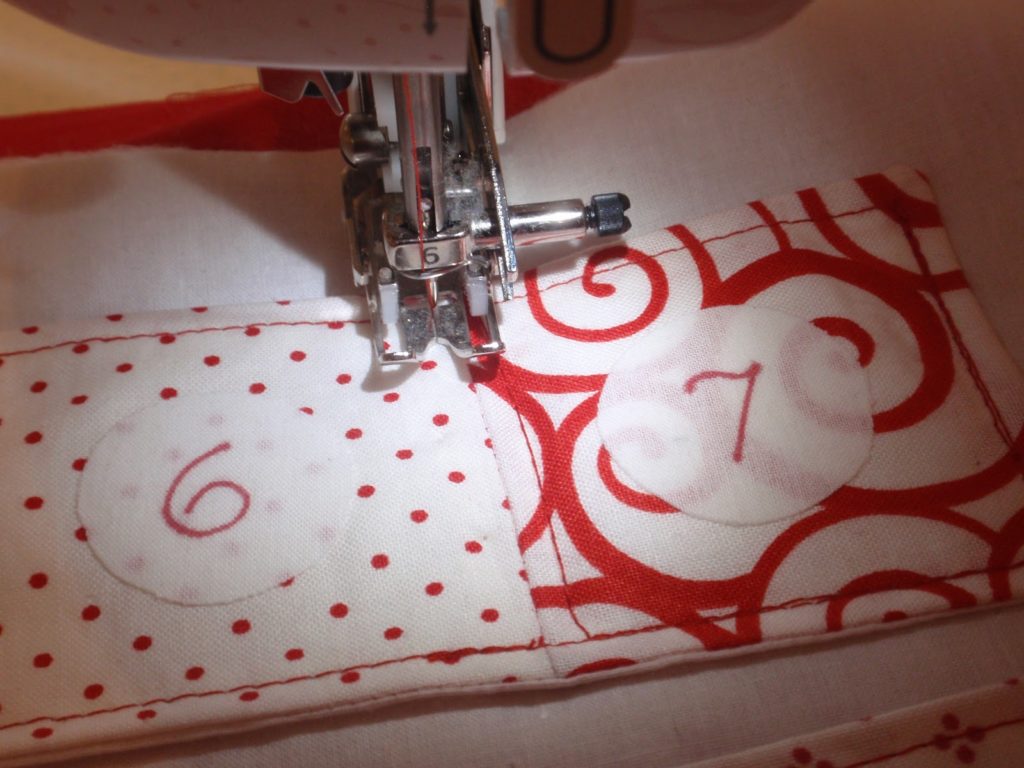
Top stitch all the way around the pockets, close to the edge.
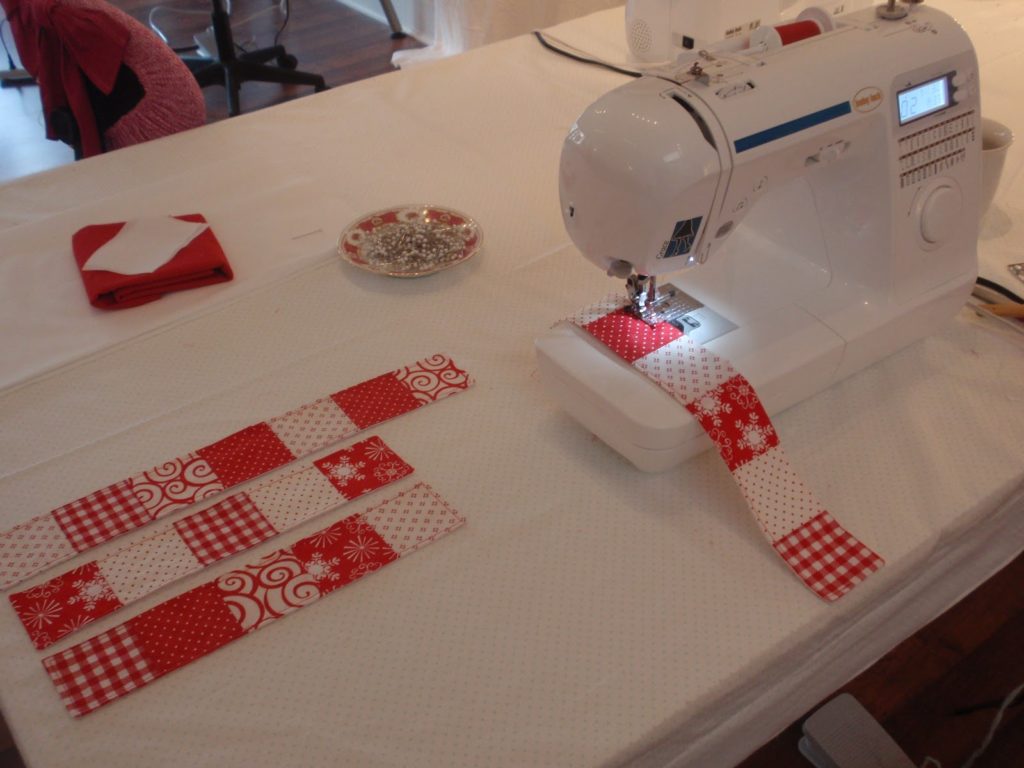
Repeat the same steps to complete the 5″ square pocket.
Part 2: Making the Numbers
This part doesn’t involve sewing. So if you have a helper who you can trust with a pair of scissors and an iron, you could outsource this part of the project.
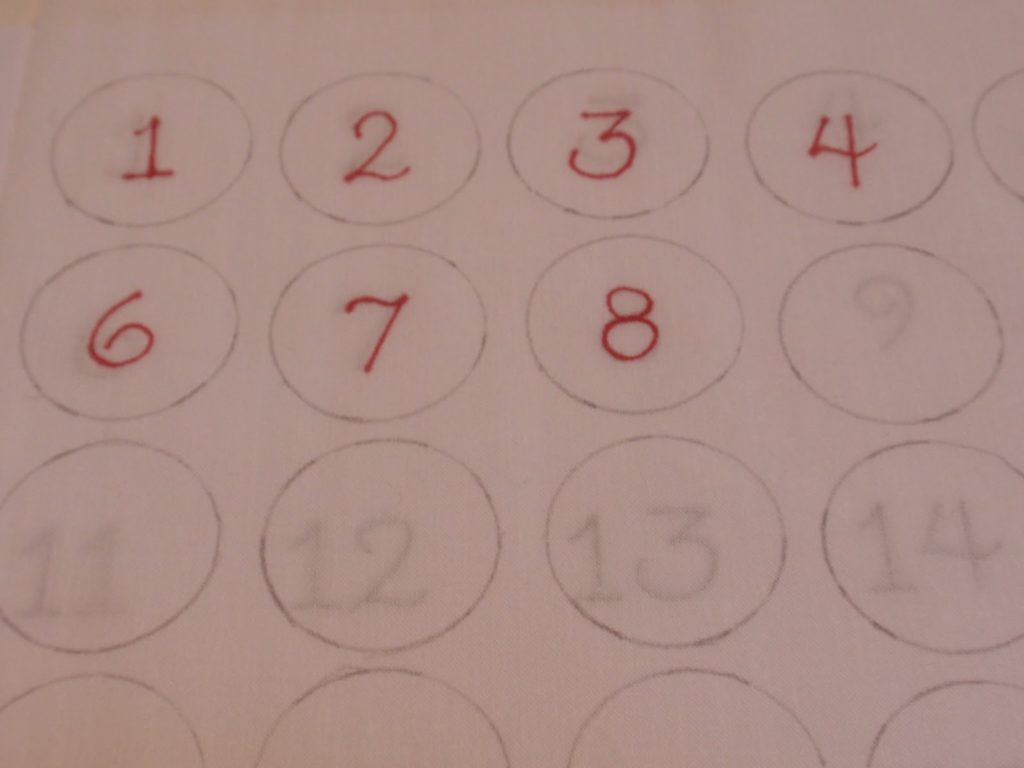
I traced small circles onto my white fabric using a regular pencil. I discovered that tracing my spool of thread created a nice circle, slightly larger than 1″.
Print out the numbers 1 through 25 in a stylish font and then trace them onto your white fabric with a permanent fabric marker.
Heat set the ink, following the directions on the fabric marker packaging.
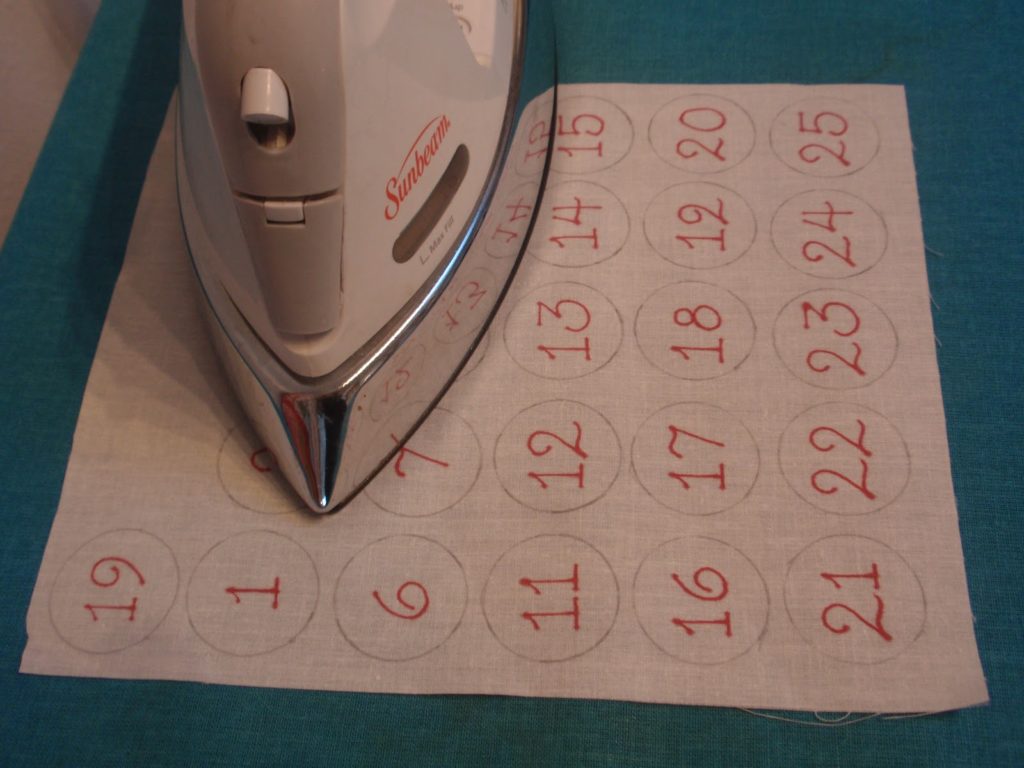
Peel off one side of the steam-a-seam and place the fabric on top.
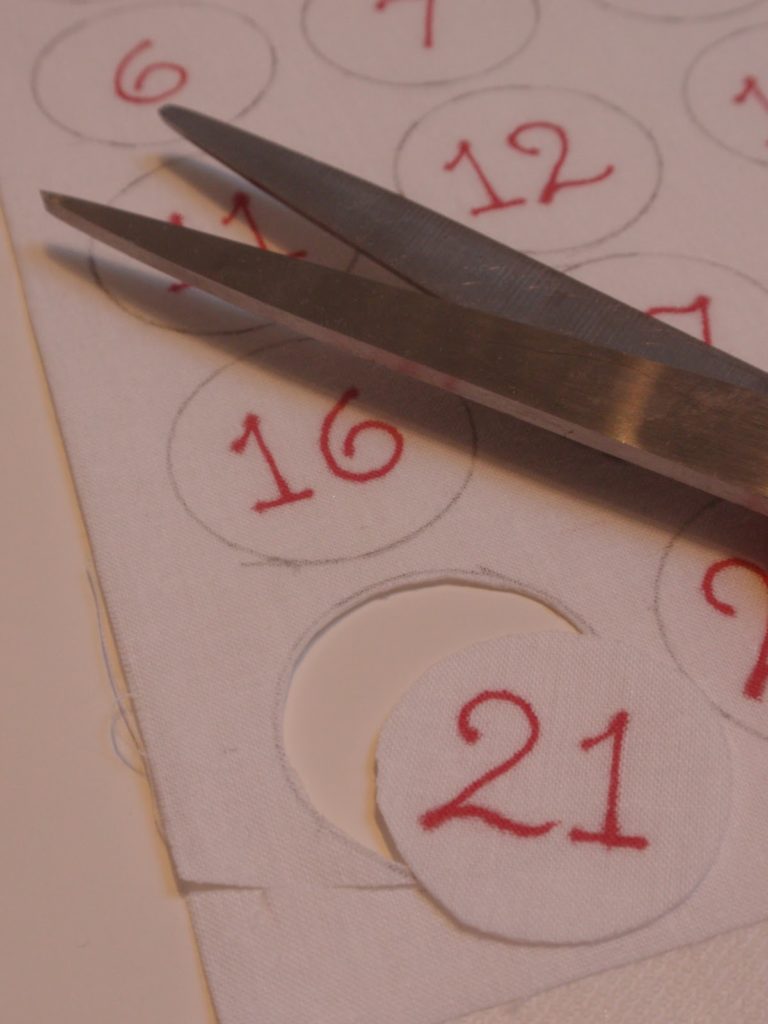
Cut out the circles inside the pencil marks.
Peel off the other side of the Steam-a-Seam and place numbers onto the squares.
Adhere the numbers following the directions on the Steam-a-Seam packaging.
Part 3: Putting it Together
If you are using fusible fleece, fuse it to your front white fabric first following the directions on the packaging.
If you are using batting, you’ll want it to be several inches larger than your front fabric on each side. Don’t trim until after everything is sewn together.
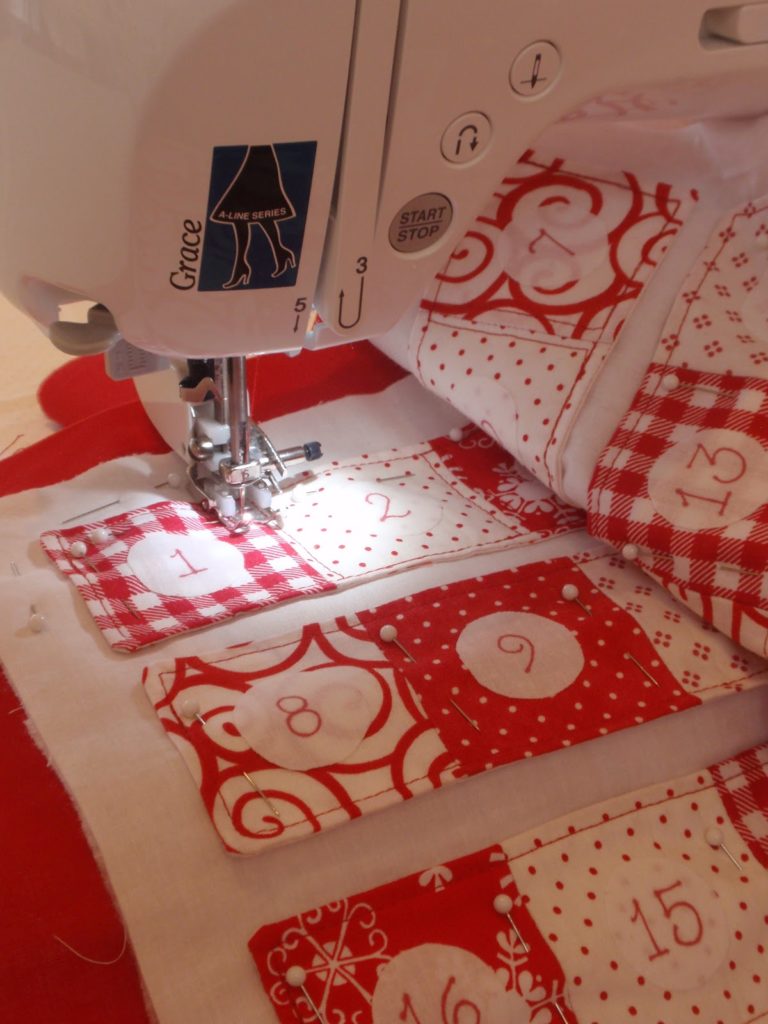
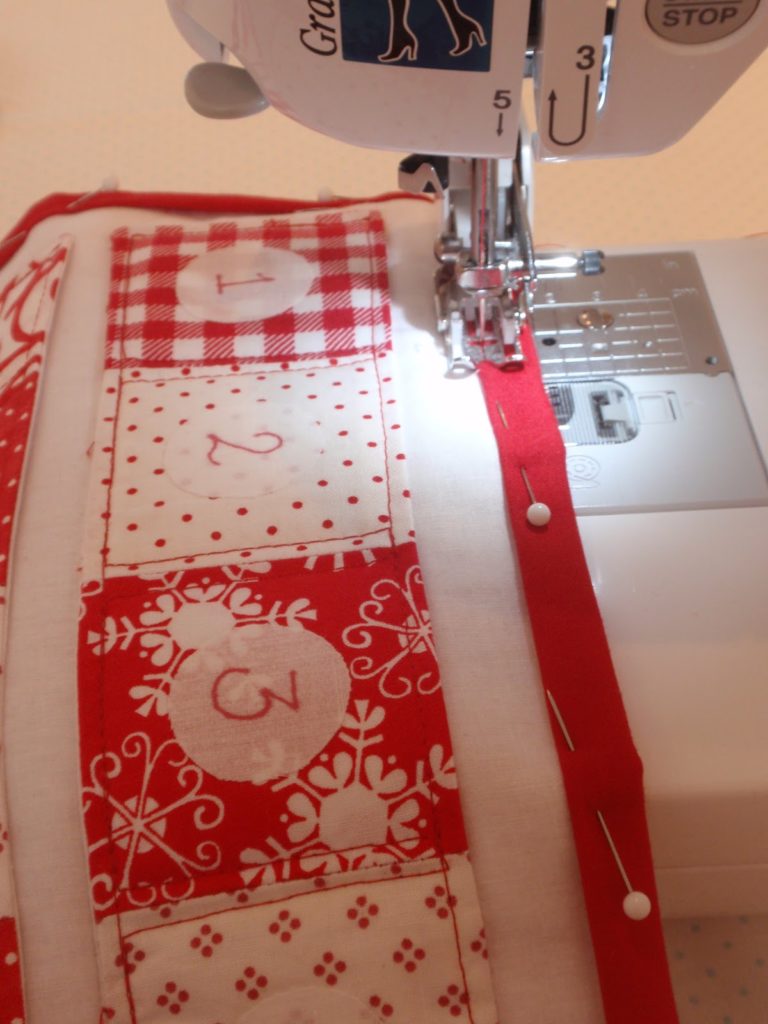
Make a “quilt sandwich” with backing on the bottom, fusible fleece (or batting) in the middle, and front fabric on top. Arrange the pockets on the very top and pin everything together. (Use lots of pins!)
Switch the foot of your sewing machine to a walking foot, if you have one. It will help keep all the layers of fabric from shifting.
Begin stitching in the top corner of each pocket and stitch down the side. Lift the pressure foot and rotate the fabric 90 degrees. Lower the pressure foot and continue stitching along the bottom of the pocket.
Before you reach the seam between the squares, rotate 90 degrees and
go up to make a pocket divide. When you reach the top of the pocket, rotate 90 degrees and make a few stitches along the top of the pocket.
Rotate and stitch down the pocket again. Continue in this manner until your reach the end of the pocket.
Repeat for the remaining pockets.
If you used batting instead of fusible fleece, now is the time to trim it to the size of the front fabric.
Trim the backing fabric to 1″ beyond the front on each side.
Following Jera’s instructions for Quick Quilt Binding, fold the edge of the backing over onto the front and pin in place.
Top stitch close to the folded edge.
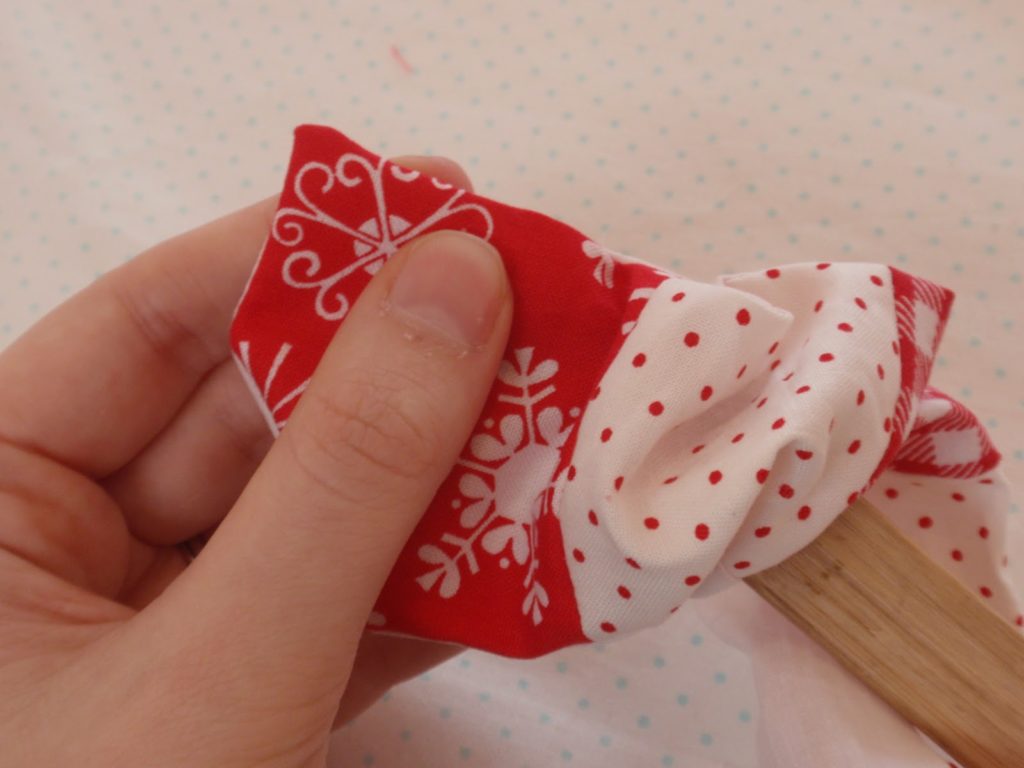
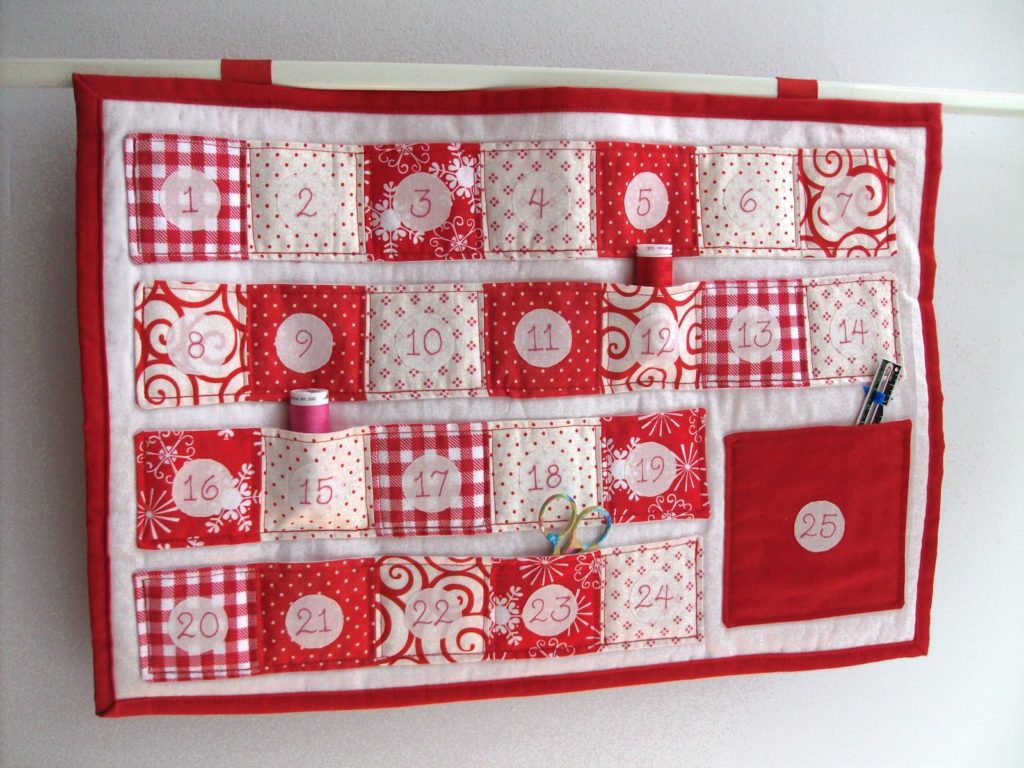
For hanging: Cut two 3″ long pieces of ribbon. Fold each piece in half lengthwise and sew the ends together. Turn inside out and pin to the back of the calendar, as shown. Stitch in place.

That’s it. You’re done!
Now you can fill the pockets with toys, treats, or little notes and start counting down to Christmas day.
Happy Holidays & Happy Stitching!!
~ Tiffany